“There ain’t a side of the tracks more wrong than under ’em.”
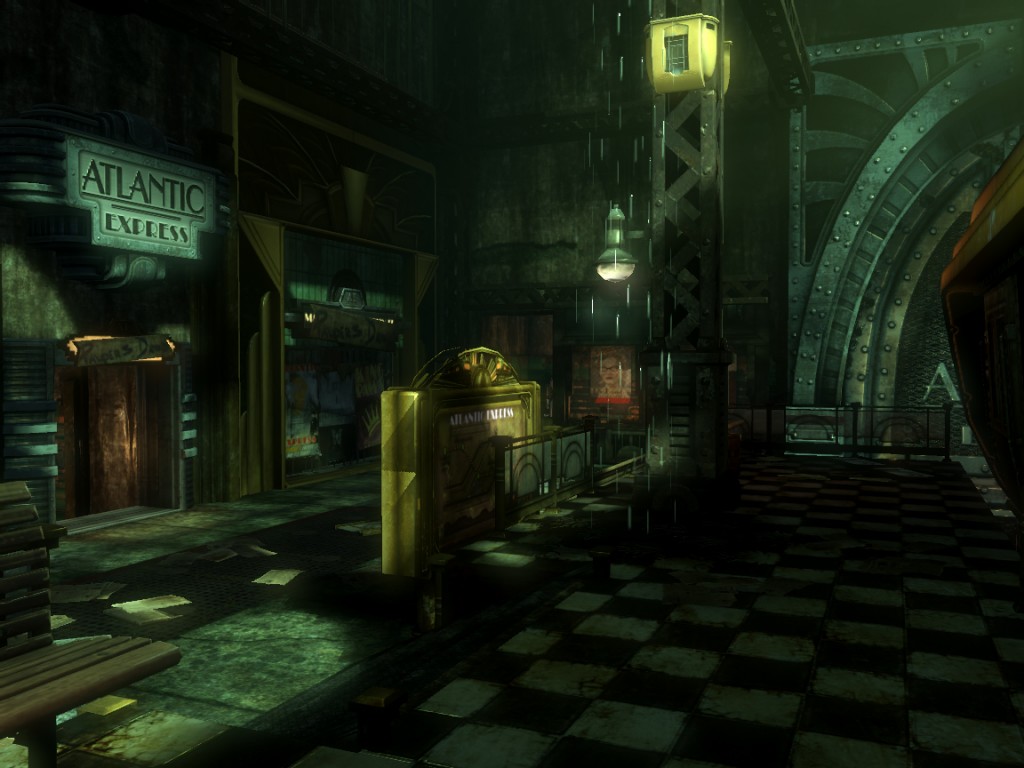
Annotated Walkthrough, 1:
Stepping onto the platform at the start of the level one thing is immediately clear, this place is dirty. Compared to the luxuriant excess of the Adonis, or the manufactured joviality of Ryan Amusements, Pauper’s Drop feels old, decrepit. Designed initially as temporary housing for the workers building the Atlantis Express Line, The Drop became home when those workers found there was no place for them in the rest of Rapture.
The hand written sign above the entrance way says it all, whatever this place was before, it’s Pauper’s Drop now.
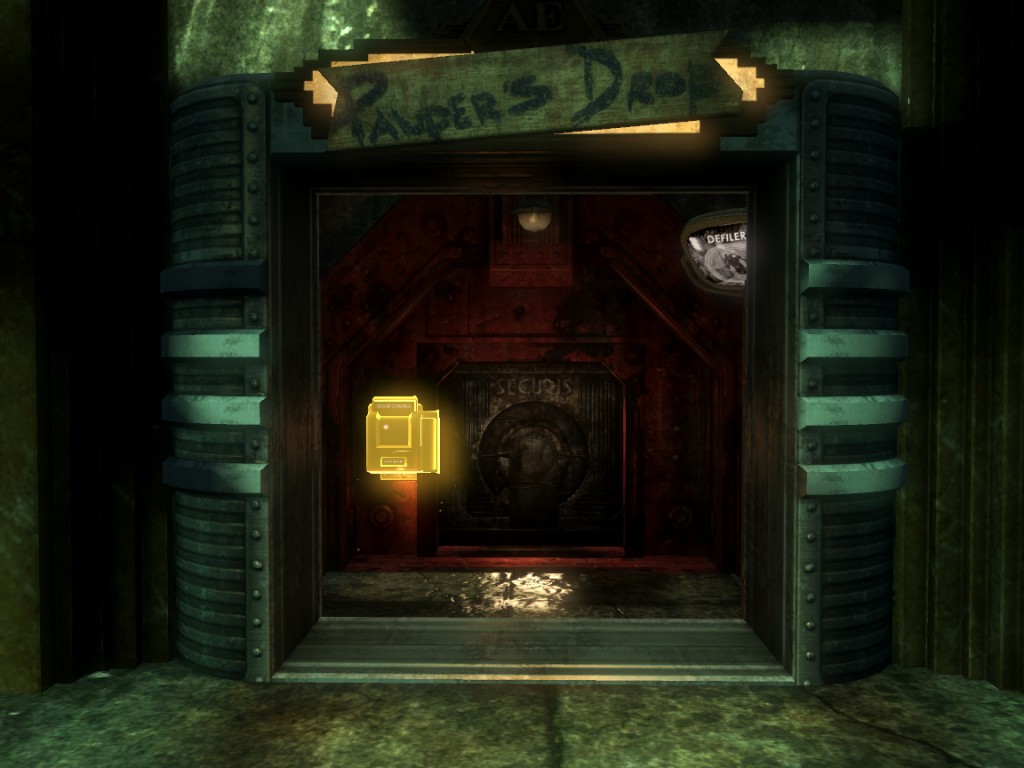
It’s interesting to note that The Drop appears to be sealed from the outside. A decision by those above to keep somebody in, or the work of a friend to those within, to keep the rest of Rapture at bay?
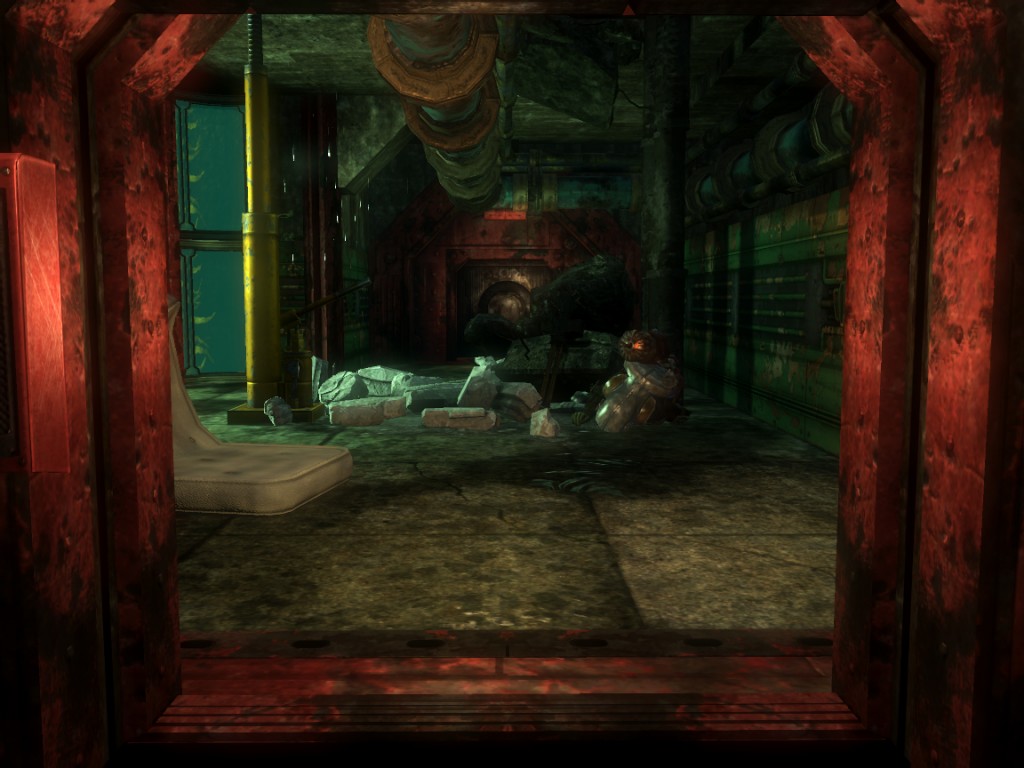
Even before you’ve entered The Drop proper there’s a distinct air of humanity to the place that has been lacking so far in your return to Rapture. This place might not be particularly welcoming but for somebody it’s home, and as a product of the Rapture above, you are not welcome. That’s made abundantly clear from the moment you Hack your way in, the first sight to great you being the corpse of a fellow Big Daddy, a Rosie. This is a motif that is repeated throughout the level. Big Daddies are not welcome in The Drop, Subject Delta especially not.
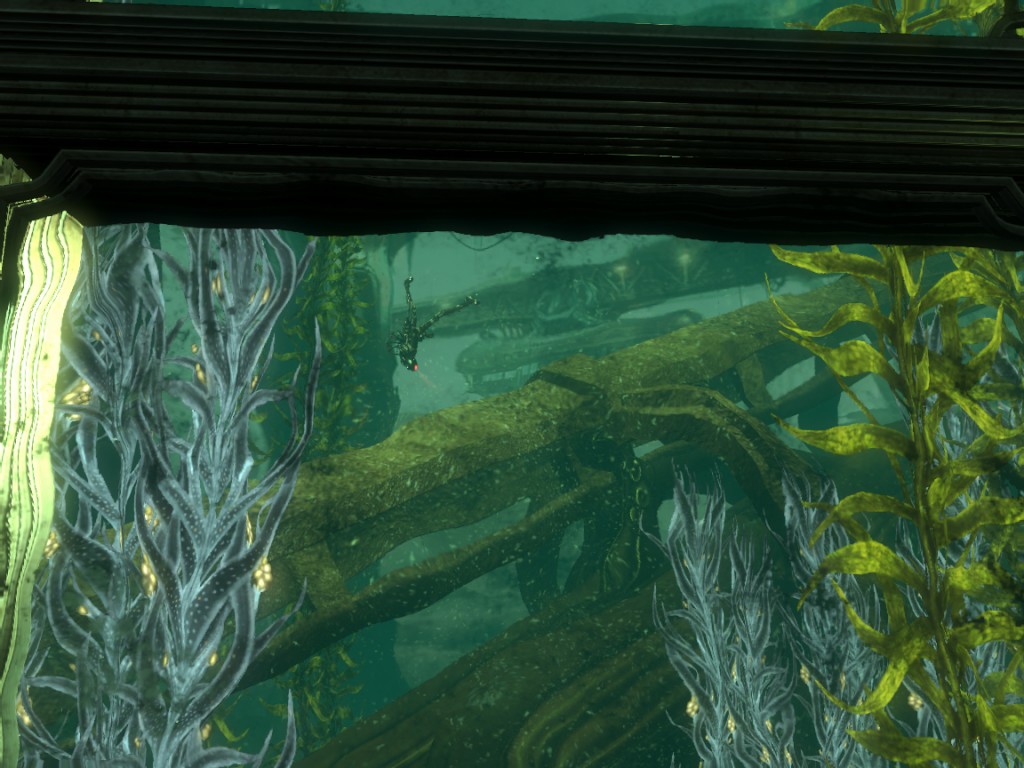
Moving forward you can see the various lines of the Atlantic Express stretching off across Rapture, and Big Sister watching. Looking through the windows throughout Pauper’s Drop you can see Big Sister circling in several locations, observing, waiting.
Heading further forward you come across something that has only really been hinted at in the proceeding levels. The deification of Eleanor Lamb is one of the key themes of BioShock 2, and the ritualistic nature of it is a concept that is first presented here for a payoff at the conclusion of the subsequent level, and a confrontation with the self styled Father Whales in Siren Alley.
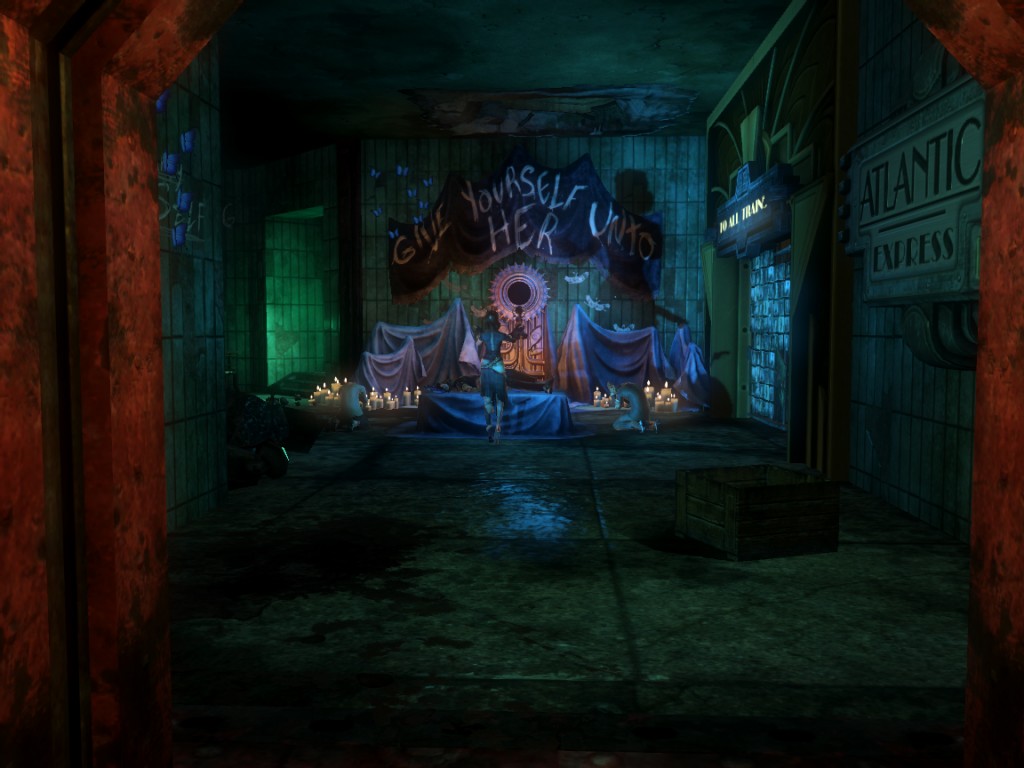
Rounding the corner the level opens up as you approach the Fishbowl Diner and after your second sighting of the Brute Splicer, you are ‘welcomed’ by Grace Holloway, a character who knows who you are even if you don’t know yourself. The area in which the Diner is situation is one of the most open areas yet experienced in BioShock 2, and it serves as a hub from which you can explore the separate wings of The Drop.
Like all such locations in BioShock 2 the area around the Diner appears more open than it actually is. There are few entirely clear sights lines between one side and the other. As well as helping with the optimisation of the level by ensuring that not everything can be seen at once, it also means that there is a variety of cover for both you and your opponents during combat.
Trapped in Pauper’s Drop you need to gain access to the Sinclair Deluxe and obtain the override key from Grace Holloway. That things will not go as simply as that is a given, and if you decide to approach the Sinclair Deluxe first you will find their way blocked by a Brute Splicer acting on the orders of Grace herself. In order to clear this obstruction you will need to locate and make use of the Research Camera, a device familiar to players of BioShock.
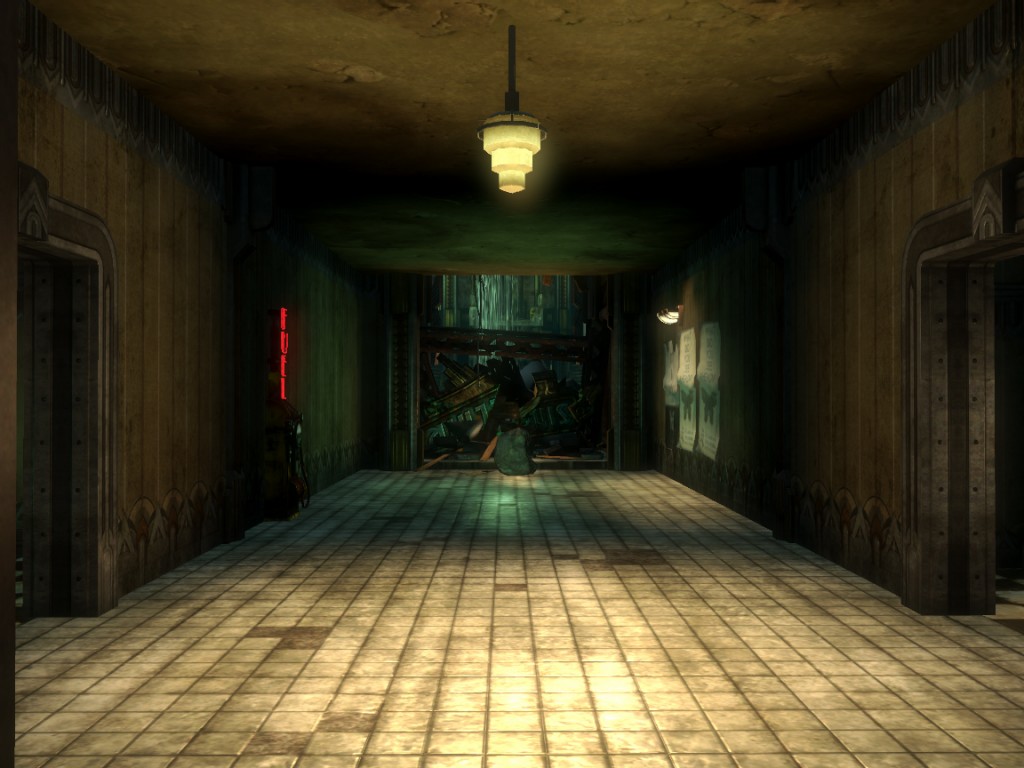
This form of gated progression is a common technique to keep players from moving onward until a particular skill has been learnt or tool acquired. It is a technique used extensively throughout Half-Life 2 and is to some degree a form of the tool based exploration that is one of the cornerstones of the Metroid series.
Though free to explore the Diner and Downtown in any order you choose the Sinclair Deluxe is off limits until you have proven your understanding of the Research Camera. A skill that will prove vitally important as the game progresses. This is a very similar goal to that used in BioShock‘s third level, Neptune’s Bounty, where players are required to photograph, and defeat, three Spider Splicers in order to convince Peach Wilkins to grant them access to the Smuggler’s Hideout.
Actually obtaining the Research Camera is a multi-part objective in itself. You will need to explore the whole of the first section of Pauper’s Drop in order to locate it and only then will you be able to access the Market, where the Camera can be used to research a Brute Splicer and grant you the Drill Dash ability.
The Camera itself can be found within King Pawn in the Downtown district, and it is here that you will head if you heed the advice of Augustus Sinclair. The doors to King Pawn itself have been chained shut and you will need to find another way in through the Clinic. However the Clinic itself requires a keycode to enter, a code which can be found within the Fishbowl Diner.
Since there is no explicit requirement to enter the Sinclair Deluxe until after you have visited one or more of the other locations several variations of Sinclair’s dialogue have been recorded in order to provide the correct information in the correct order. The keycode lock on the Clinic door is another form of gated progression, serving to ensure players understand the need to locate keycodes using clues within the environment, often through listening to audio logs. It’s worth noting that the audio log outside the Clinic explaining the whereabouts of the person responsible for changing the code, Tobias Riefers, plays automatically upon collection; unlike the majority of other audio logs throughout the game. This particular log contains important information and therefore you are required to listen to it. Showing players a location and then requiring that they return to it to complete a subsequent objective is a common means of making use of all the available space while instilling a sense of familiarity in players.
Asking players to explore a location they are already aware of reinforces the interconnected nature of a level, this is especially true if the game recognises that the player has already completed any objective in this area the first time around. Something BioShock 2 does at several points throughout Pauper’s Drop.
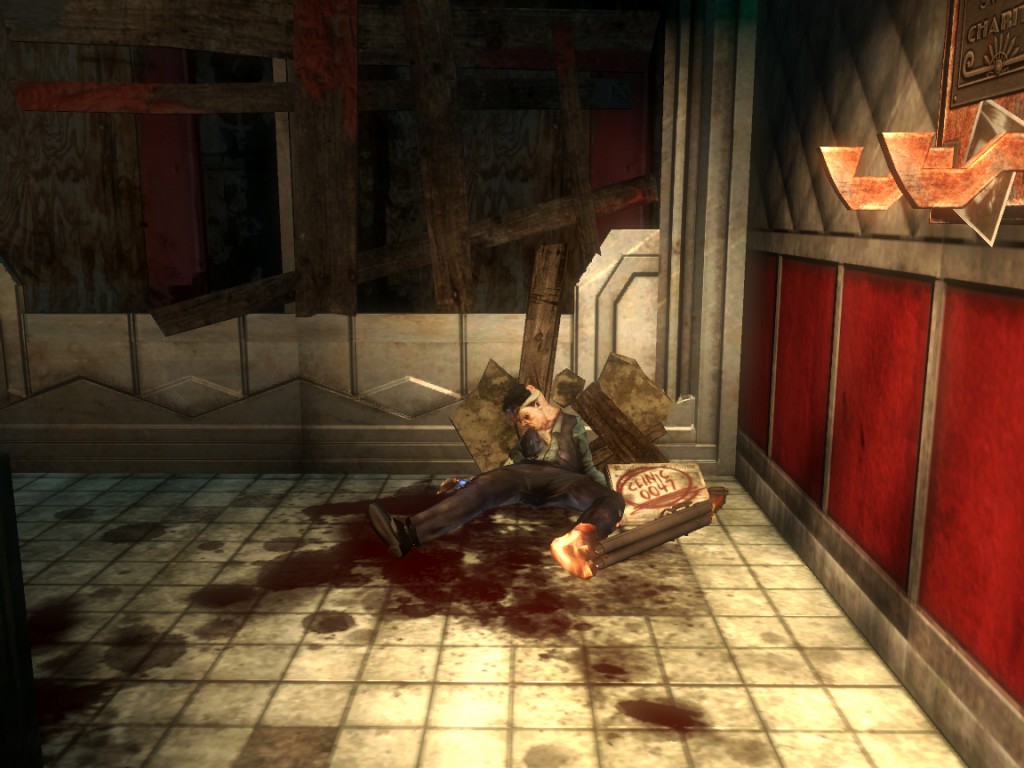
The late Tobias Riefers can be found slumped against the wall inside the Fishbowl Diner, the Shotgun in his possession apparently not enough to prevent his death. Though it’s presence does make you wonder why none of the Splicers around have taken it for themselves…
The ambush upon obtaining the Shotgun is reminiscent of a similar occurrence in the Medical Pavilion in BioShock, it would appear in Rapture the Shotgun is a highly popular form of bait. The ambush itself serves an interesting purpose, it is unlikely that many will will switch out the Shotgun for another weapon having just acquired it, so the attack in close quarters serves to highlight both the main strength of the Shotgun and it’s major weakness. Attacked at such close quarters the first Splicer will almost certainly be on the receiving end of a point blank blast to the face, an action almost certain to be fatal. However from here the encounter gets more unpredictable, as the small magazine size (Two shells) make itself immediately apparent. You will need to either switch to an alternate weapon or start to get creative with combinations of Plasmids and melee attacks. The lessons learnt in this brief encounter will serve you well when you enter the Sinclair Deluxe and are faced with a number of similarly point blank encounters. It may also inform the decisions you make upon next locating a Power to the People machine, that Shotgun Clip Size upgrade is clearly a useful proposition in any close range encounter.
With the code in hand it’s time to head Downtown and, assuming you’ve not been there before, your first encounter with a Brute Splicer.
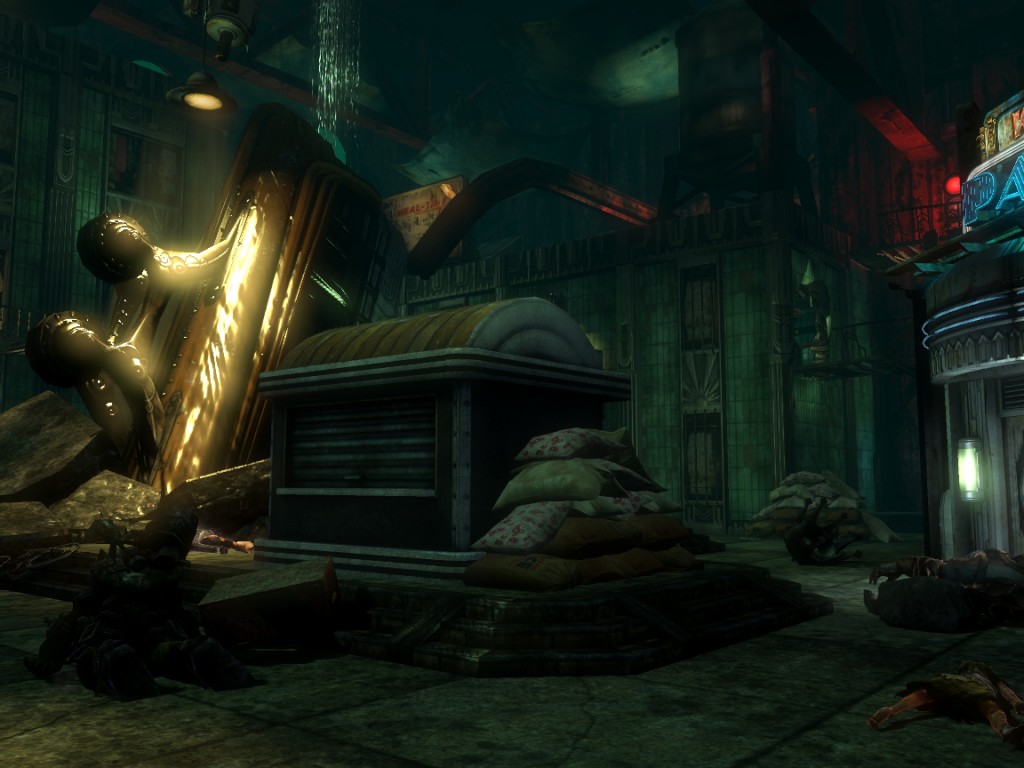
The Downtown section of Pauper’s Drop is less open than the area around the Diner and initially appears much smaller. Your objective is clear from the first moment you step into this area, the broken neon signage above King Pawn is impossible to miss, this signposting augmented by the sight of the Brute Splicer jumping from the roof toward you. One thing is clear this is an important location and one you should seek to explore.
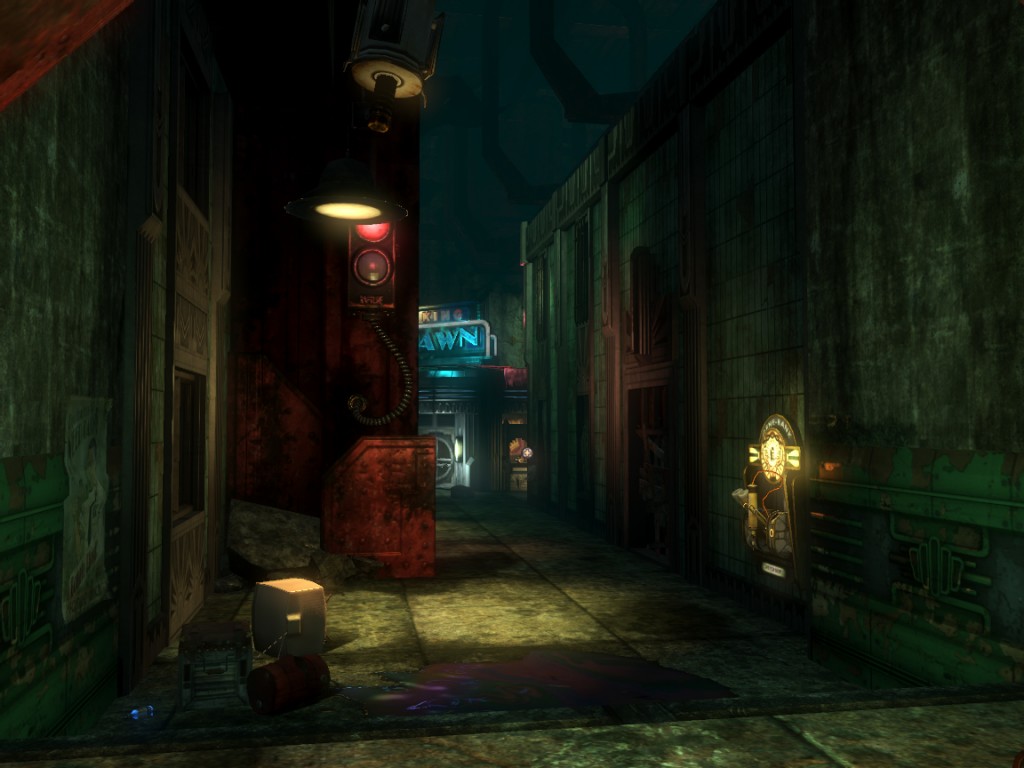
The door to King Pawn is chained and padlocked and an alternate means of entry is not immediately obvious. If this is your first time in Downtown the audio log leaning against the wall of the Clinic and the keycode locked door are clear indicators that this is somewhere that warrants further investigation. If you are returning here having already secured the keycode it’s likely you’ll enter the Clinic immediately and pay little attention to the other doorway in this area. On the opposite side of the central square to King Pawn, past the fallen train car, the way to the Market is currently inaccessible, presumable to prevent anybody from defeating the second Brute Splicer before they have obtained the Research Camera. Since anybody reaching this point is likely to be more interested in King Pawn and the Clinic it’s likely few will realise this door is sealed shut until the Research Camera has been acquired. It’s a rare instance of being locked into a particular area without some form of explicit in world acknowledgement. However the low probability of anybody attempting this door until the correct time means drawing attention to it would probably do more harm than good.
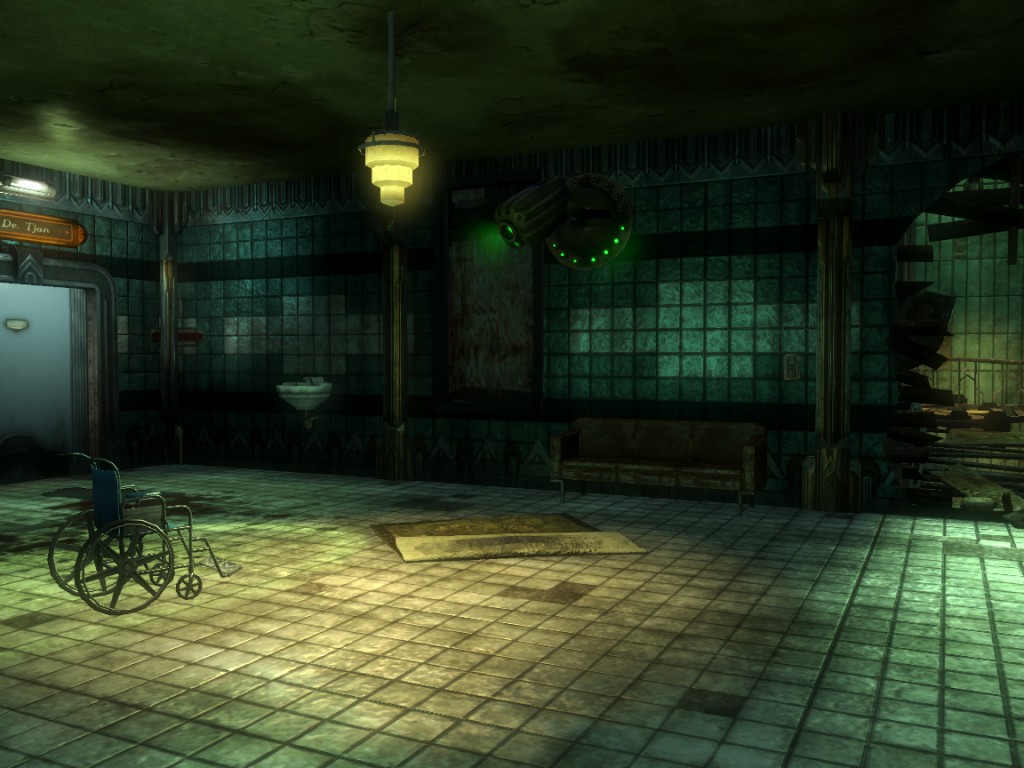
Entering the Clinic was the moment that defined this level for me personally. Up until this point the layout had seemed to conform to a fairly standard design, similar to the majority of levels in BioShock: a central hub area with a number of side spokes branching from it. A floor plan exemplified by the Medical Pavilion and Hephaestus among others. Though Pauper’s Drop conforms to this design on a macro scale, each spoke serves as it’s own little hub from which areas seem to branch outward and outward. Moving up the stairs I was expecting to find a back room that allowed access to King Pawn and maybe one or two extra rooms containing items and possibly an audio log. Instead there are two exits at the top of the stairs and exploring either leads to various walkways, and hidden rooms, with little obvious dead end in sight. In the space of one moment an area that had seemed so obviously limited in scope became a much more interesting place.
What seems obvious on the surface is hiding a web of interconnected passages and backrooms. There is much more to be seen if you scratch the surface than you would imagine from a cursory glance. It is a metaphor for BioShock 2 itself, there is greater complexity at work than might initially appear. Stumbling over walkways between rooftops and through decaying apartment buildings I felt like I had changed from a visitor with a very specific objective, to an explorer rummaging through the private areas of Rapture. I was no longer an observer I was an inhabitant.
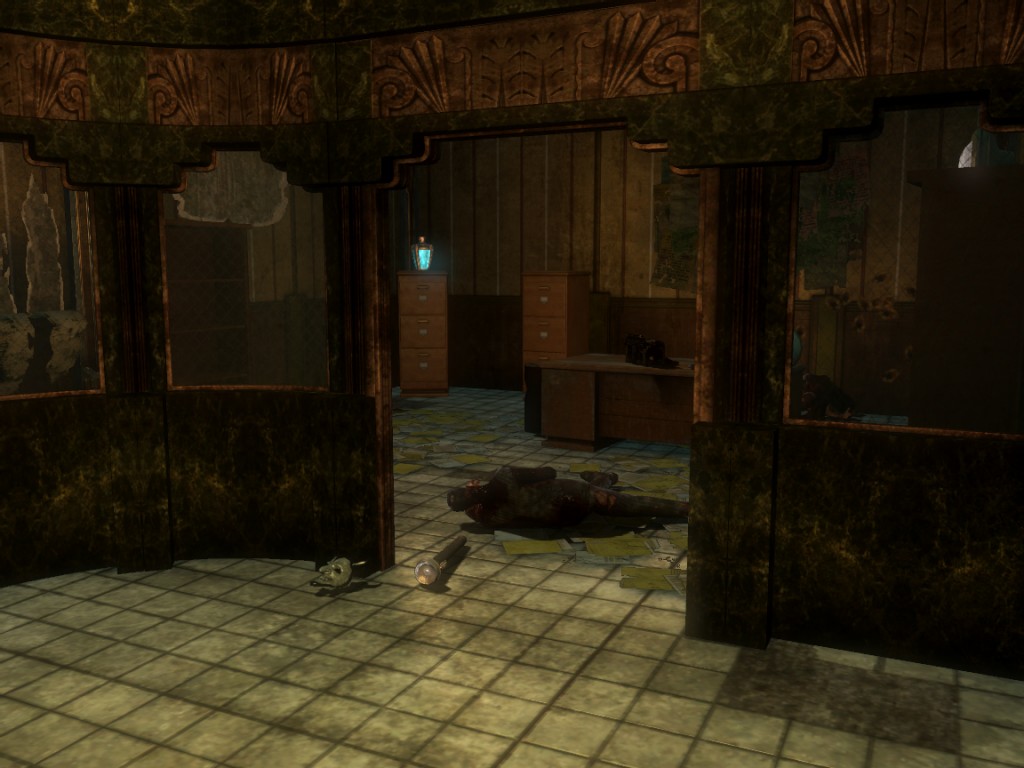
Among the many areas that become accessible upon entering the Clinic, the majority of which are not vital to progression, is the office of Private Investigator Rock Flanagan, in whose office can be found an audio log describing how he had to pawn his Genetic Research Camera. Since this reinforces something we have already been told, that there is a Research Camera in King Pawn, I wonder if at some point during the development of Pauper’s Drop players had been required to actually locate the Research Camera for themselves and this audio log is a remnant of a previous focus on investigation. Something that would fit with the obvious ‘Film Noir’ references throughout The Drop. This concept seems to be reinforced by comments made by Senior Level Architect Alex Munn in the Deco Devolution art book.
It’s actually possible to gain entry to King Pawn fairly quickly after entering the Clinic, however with so many options available for exploration it’s unlikely you will go there immediately. When you do find your way into the pawnshop the method you use is one that will soon become familiar, especially in Siren Alley. Using a hole in the roof to gain access to an otherwise blocked area, or alternately using a hole to rapidly exit from an area, is something that you will find yourself doing several times before the game is over.
Both of these layouts are variations on the structure of level design I refer to as a loop, or circuit. In essence it is the concept of: long way there, short way back. Players are required to invest time and resources in order to access a climatic or otherwise important part of a level but from there can return to the start quickly. This is usually achieved in one of two ways, by completing a loop that only works in one direction a ‘saw-tooth’ loop or by ‘unblocking’ a route that had initially been sealed. Numerous examples of the ‘saw-tooth’ loop can be seen in Borderlands where players are required to make their way through a number of lower level enemies gradually in order to reach a boss encounter. Once the boss is defeated the layout will allow players to jump from a window, balcony, or ledge to a location much closer to the start of the level.
The ‘unblocking’ form of loop is seen in Ryan Amusements, where upon reaching the end of the Journey To The Surface, players activate the security override and open previously sealed doors throughout the level, allowing rapid access to the start of the ride.
This form of looping structure can also be combined with gated progression to lock players into a particular location until they can perform a required task. A good example of this can be seen in Half-Life 2: Episode 2 where players drop through a window into a confined location and must destroy the Combine Auto Turrets within in order to leave.
Now that the Research Camera has been found it’s time to head to the Market district, aka Skid Row…
5 replies on “Groping The Map: Pauper’s Drop, Part 2.”
Great job with part 2 of Bioshock 2’s map analysis. Certainly there were things you illuminated that I never noticed, or simply walked by whilst playing the game. If it’s alright to ask, how do you go about conducting your analysis?
Just a simple play-through and stop to take notes of whatever it is you see? Or a more methodical process? Do you contrast to other games? Refer to other literature? Or is this purely a single game-single focus exercise?
Good stuff, man. It’s a shame there isn’t a way for you to to add in level commentary nodes or a Matinee to go through these levels, uh, inside the levels.
@Junch: By the time I started this series I had played through Pauper’s Drop twice, once on Xbox 360 once on PC. When I decided to start the series with this level I returned once again to the PC version for a further play through, this time being careful to make saves at important points and take a lot of screenshots.
While working on the article I have returned to specific parts of the level numerous times, exploring different areas and attempting different things. I take notes when I remember too, but all too often a lot of what I’m writing about is apparent to me after simply spending time within the level so all notes are in my head.
The turning point I discussed, entering the Clinic, is something that hit me the first time through on 360. That is in no small part due to the manner in which I had been mentally charting the layout of the level and how it compared to levels in similar games and to those of the original BioShock in particular. This is an ability (Some would say a curse) I am stuck with, it’s difficult for me not to analyse a level while playing it.
There’s no scientific method per say, and I’m sure my methodology will change for subsequent levels. As of now I simply play as much as I can and let everything sink in before I start to write. Then I make sure to return to the level frequently to validation or repudiate my conclusions.
LOL, it’s not a curse for you to be analyzing a level, or the game as a whole, for that matter. I always believe that consumption should have a degree of reflection, otherwise what’s the point of it all?
Also, I’ve conducted textual analysis on video games for papers myself, and an efficiency suggestion would be to voice-record your thoughts whilst playing. You say out loud the things you’ve spotted, or have analyzed, and that way you won’t have to stop to write anything down as the action is happening. It’s almost like telling your friend interesting stuff about the game as he’s watching you play it.
But what you’re doing sounds good. Keep it up, really enjoying it. I’d be curious to see what other games you’ll be looking at.
You’ve made some very interesting observations here, especially on the design of circuitous maps.
There’s a huge number of instances in World of Warcraft (which I’ve been recently playing) that utilize this particular design and thus eliminate the need for the player to return from whence he came. While instances like Dire Maul East, The Deadmines, and Blackfathom Depths have quick exits, others like the Blood Furnace in Hellfire Citadel feature a circuitous map design that has the exit unblocked once the player’s party kills the dungeon boss. Others, like Stratholme and Upper Black Rock Spire, are far less accommodating, and forced players to backtrack. Fortunately, all of the instances that were designed since Burning Crusade featured circuitous designs or quit exits.
I’ve noticed similar designs with the maps in Dragon Age, particularly in the Temple of Sacred Ashes. Upon defiling the Urn of Sacred Ashes or paying it your respects, a previously sealed frozen pathway would melt, revealing an exit back to the temple’s main hall, whereupon the player could quickly exit without having to go through the entire structure.
Good stuff. I’m going to continue reading the rest of your installments of Groping the Map.